Antenna-
installation
debugging
Is your TV signal irritating you? Then follow these steps and see if it resolves the problem.
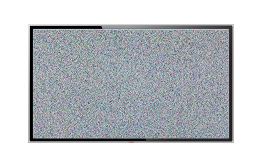
Pixelated image or black screen
If the image on your flat screen appears as such, then this is probably due to one of two reasons. The signal is too weak or the antenna installation is not completely insulated. Pixilation, or the black screen, is just one symptom of a problematic installation.
To get maximum enjoyment from your cable TV signal requires that you have a correctly installed antenna installation in the house. Most important in an antenna installation is that it is secured against external disturbances.
Disturbances on the TV signal, in most cases, is due to bad or defect cables, splitters and installations in the house. The following is a thorough guide to troubleshooting your own antenna installation.
-
Steps 1-3 – Checking of connections
- Connect the TV to the delivery point, which is the first socket in your installation. That is where your supplier/antenna group stops their cabling.
If this resolves the problem then the cause of the error can be found in the remainder of the installation. Go to step 2.
If you still experience the problem then you can isolate the problem to the antenna cable between the socket and the TV. Go to step 3.
- Repeat the process in step 1 by connecting the TV to the various sockets and noting where they function and where they do not function. When a socket with problems is identified, proceed to step 3.
- Check that the connector is tightly connected or completely inserted.
For IEC connectors: Pull out the connector and reinsert it completely with a light pressure. For F connectors: Perform a slight tightening with a hand-tool. The same is performed at all connectors in the system.
If this does not resolve the problem then go to step 4.
- Connect the TV to the delivery point, which is the first socket in your installation. That is where your supplier/antenna group stops their cabling.
-
Step 4-6 – Antenna connector and installation cables
- Check that all antenna connectors do not have a plastic cover as shown here:
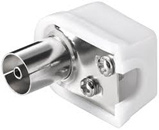
If the connector has a plastic cover then that can be the cause of the problem. It should be replaced with one that has a metal cover.
If the connector has a metal cover, but the problem persists, then proceed to step 5.
If the antenna cable has molded connectors at its ends, then proceed to step 7.
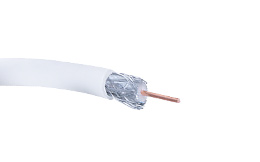
- Determine whether the installation cable is of the correct quality: Foil or woven shield. Replace it if in doubt.
Here you can read about good and bad antenna cable..
If the problem persists then proceed to step 6.
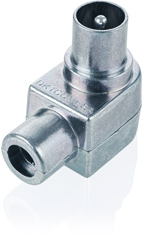
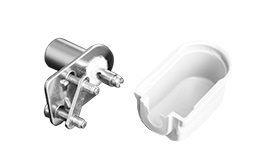
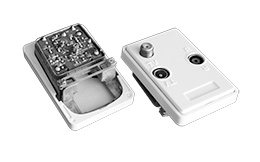
- Check that the cable’s screen has an effective metallic connection and that the socket is completely shielded.
Here you read about good and bad connection sockets.
If the cable is mounted according to its guidelines in a good socket, but the problem persists, then proceed to step 8.
- Check that all antenna connectors do not have a plastic cover as shown here:
-
Step 7-9 – Antenna cables and junctions
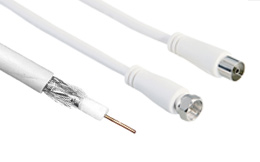
- Antenna cables with connectors are a very common source of problems. It is extremely important that these are well-shielded and that ferrite beads are mounted (increased diameter near the connector). If the connecting cable has loose connectors, then check for effective screening connections.
It can be necessary to replace antenna cables with high quality cables. We have antenna cables with mounted connectors..
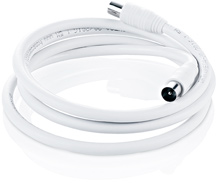
Here you read about good and bad antenna cables with connectors.
If the problem persists then proceed to step 8.
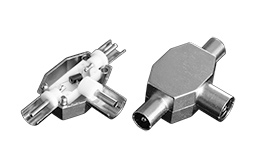
- If there are junctions on your antenna cable, then these must be correctly applied.
Read here how a junction is correctly performed.
If the junction is correctly performed, but the problem persists, then go to step 9.
If the junctions are not correct, then you can find the correct components here.
- You have reached far into the debugging path, but because the problem persists there are three possibilities:
1: A detail was missed in the debugging process. Try to redo the previous steps with a critical point of view. See step 11.
2: You have an installation with several TV sets, proceed to step 10.
3: The error is not in your home installation. Contact your provider with the possibility of debugging their part of the installation. As in step 1, this is defined by the delivery point and all the backing technology.
- Antenna cables with connectors are a very common source of problems. It is extremely important that these are well-shielded and that ferrite beads are mounted (increased diameter near the connector). If the connecting cable has loose connectors, then check for effective screening connections.
-
Step 10-11 – Installations with several TV sets and amplifier
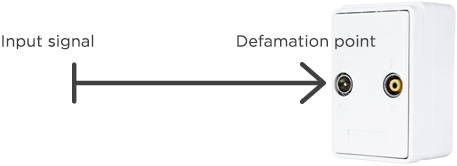
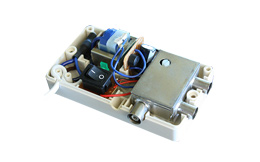
- Install an amplifier with several outputs immediately after the delivery point and connect the sockets to the amplifier. You can see how the amplifier is connected in the following diagram.
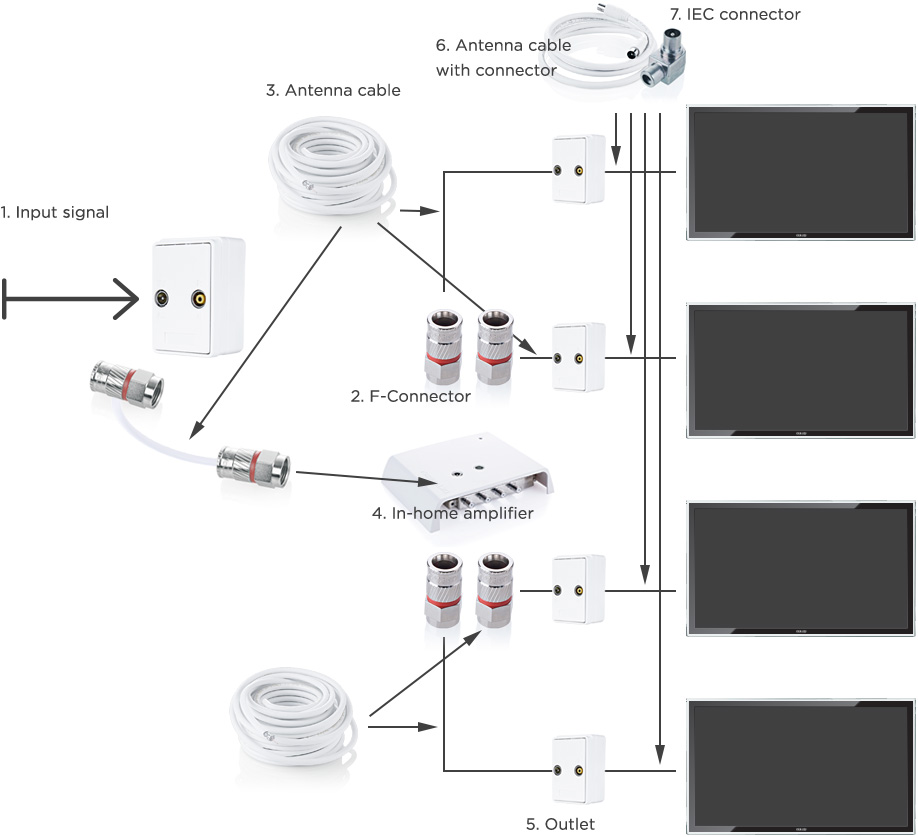
1. Input signal. It is here that your provider/supplier/antenna organization complete their installation in your home. This is also called the delivery point. At this point your provider has measured the signal and ensured and that it satisfies requirements such as strength etc.
2. F-connector. This connector is the standard for most connections before the socket and TV. The thread ensures that it does not disconnect as antenna connectors sometimes do.
3. The antenna cable is used to connect all units in your installation. A good antenna cable has as its outset two protective shields.
4. Amplifier with several outputs. Here all the subsequent wall sockets/boxes are connected.
5. The outlet bused to terminate cabling from an amplifier and provides the output for the antenna connector to the TV.
6. Connecting cables are used to terminate cabling from an amplifier and provides the output for the antenna connector to the TV.
7. The self-built antenna cable is another solution. Here connectors are mounted by oneself on the antenna cable.
Be aware that the quality of your amplifier can vary. We recommend a good amplifier. You can read more why we do this here.
If the problem persists then go to step 8.
- If the previous steps have not resolved the problem, then there is a set of tips and tricks that may resolve the problem.
Sometimes the TV can have bad screening against disturbing signals. It can be counteracted by amplifying signals immediately prior to entering the TV.You can read more about this method here..
If this has not helped then go to step 9..
- Install an amplifier with several outputs immediately after the delivery point and connect the sockets to the amplifier. You can see how the amplifier is connected in the following diagram.
Bad image quality? Here are the typical sources of the problem.
Interference in TV signals is caused, in the majority of cases, by bad or defective cables, splitters and installations in the house. Here are the typical error sources that do not provide enough protection against interfering signals and should be replaced.


if you have bought products from this page you are naturally
still covered by a full 2 year warranty and you will have access to full support.
We are available for you at
support@dkthome.dk.